How to Size Powder Coating Booths for High-Volume Lines
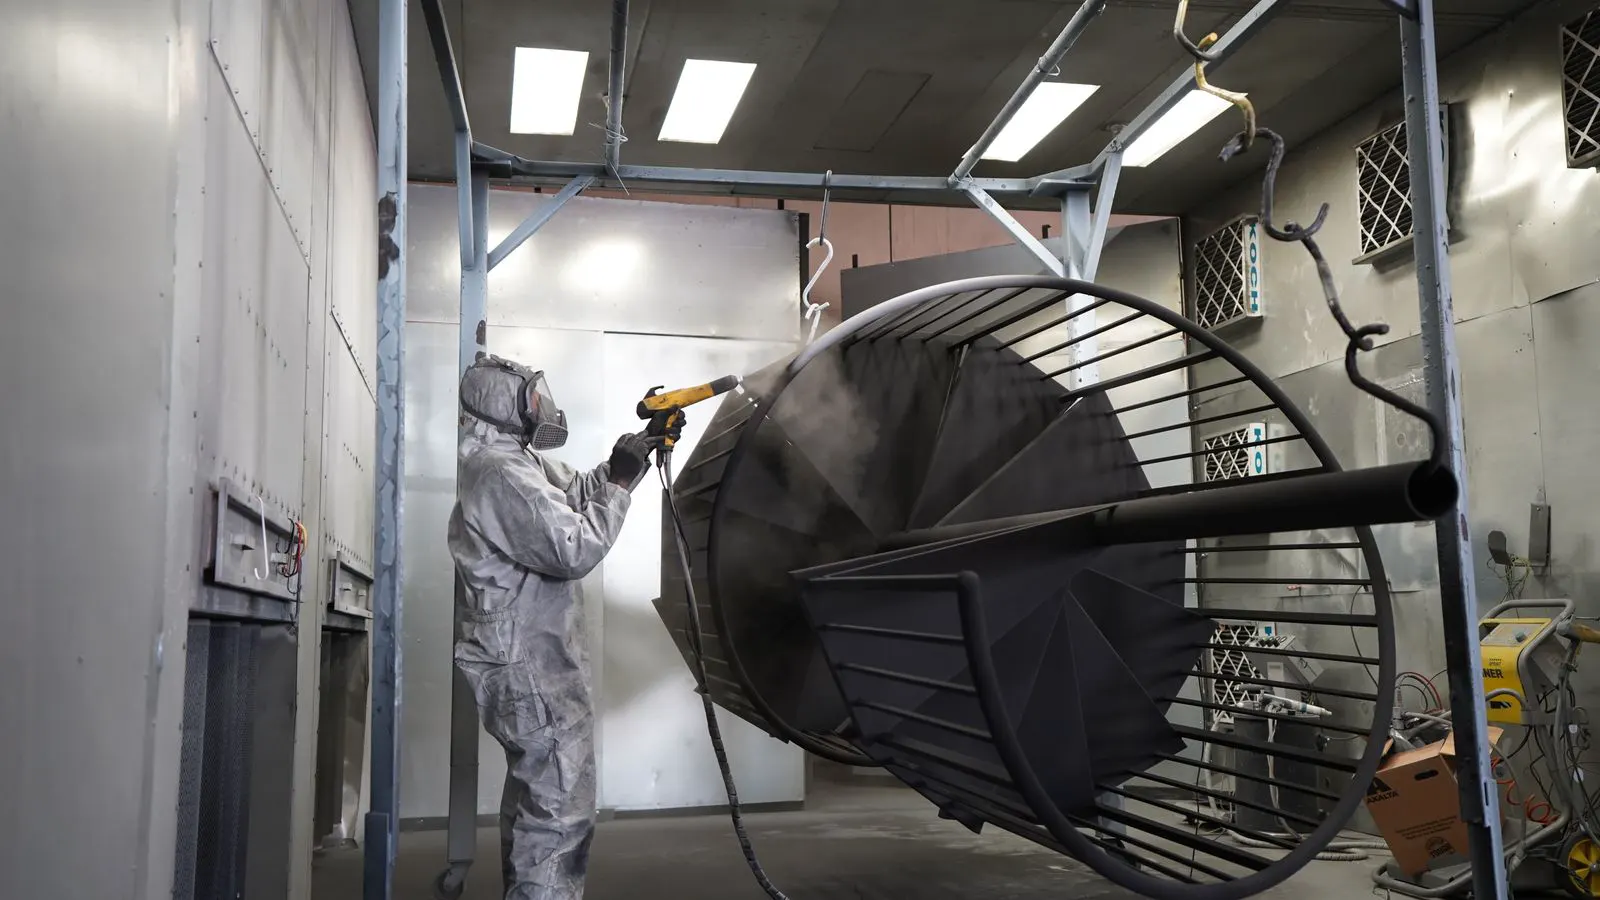
To size a powder coating booth, match cross-section to air velocity and parts load. Use mass flow equations, apply safety factors, and verify with test runs. This ensures the powder coating equipment handles peak loads without overspray loss.
- Match booth cross-section to mass flow velocity to keep powder suspended.
- Include a 20 to 30 percent safety factor for peak production surges.
- Verify final booth dimensions with a test run using standard parts.
- Account for rack spacing and part geometry in airflow calculations.
- Review booth sizing against daily production targets before ordering.
Why Booth Sizing Fails in High-Volume Lines
Most sizing errors start with a guess. A buyer picks a standard booth size, orders the powder coating equipment, and finds the line starves during peak hours. The result is a thin film, poor cure, and a pile of parts sent back for touch-up.
The core problem is a mismatch between airflow and parts load. A booth is not just a room with a filter. It is a mass flow system. Powder particles must move through a defined cross-section at a steady velocity. If the velocity drops, particles settle on the rack or floor. If it spikes, powder escapes into the shop floor or the exhaust.
High-volume lines amplify this issue. A line running 2,000 parts a day cannot tolerate the same airflow variance as a job shop. The booth must handle the maximum expected parts density, not just the average. This guide walks through the calculation steps so your powder coating equipment matches the physical reality of your production floor.
Prerequisites: Data You Need Before Calculating
Do not start the math until you have these numbers on paper. Missing data leads to a second guess that costs more than the first.
- Daily production target. List the maximum number of parts per shift.
- Part surface area. Measure or estimate the total square footage of coating area per part.
- Parts load per rack. How many racks fit in the booth, and how many parts per rack.
- Cycle time. The time available per part, including load, cure, and unload.
- Target film thickness. This affects the required powder deposition rate.
- Shop floor conditions. Ambient temperature and humidity affect powder flow.
If you do not have the part surface area, use a test run. Coat one part and weigh it before and after. The weight gain divided by the powder density gives you the applied area. This is the most accurate way to start.
Step 1: Calculate Total Coating Area Per Shift
Start with the total area you must coat. Multiply the daily part count by the surface area per part. This gives you the total square feet to treat in one shift.
For example, if you coat 1,000 parts per day and each part has 5 square feet of coating area, the total is 5,000 square feet. This number drives the required air volume. You are not just moving air. You are moving powder across a specific surface.
Keep this number in mind. It sets the baseline for the booth. If the line adds a second shift, double this figure. If you add a new product with a larger surface area, recalculate. The booth must handle the worst case, not the best case.
Step 2: Determine Required Air Velocity
Air velocity is the speed of the powder cloud moving through the booth. The standard range for high-volume lines is 1.5 to 2.5 meters per second. Lower velocities risk settling. Higher velocities waste powder and create overspray.
Choose a velocity based on your parts. Large, flat parts need higher velocity to keep powder in suspension. Small, dense parts tolerate lower velocity. If you are unsure, pick the middle of the range.
Velocity is a flow rate divided by the booth cross-section. If you want 2 meters per second, and your booth is 2 meters wide by 2 meters high, the cross-section is 4 square meters. The required air flow is 8 cubic meters per second. This is the core equation. Keep the velocity constant, and the air flow scales with the cross-section.
Step 3: Set the Booth Dimensions
Now you have the air flow. Pick a booth width and height that fits your racks and workflow. The length is usually set by the conveyor speed and cure cycle.
A common width is 2 to 3 meters. This fits standard racks. A height of 2 to 3 meters works for most parts. If your racks are taller, increase the height. If you run multiple racks side-by-side, increase the width.
Do not make the booth larger than needed. A bigger booth means more air to move, which means a bigger fan and higher energy costs. It also means a longer path for powder to travel. That increases the chance of settling. Match the dimensions to the racks.
Step 4: Apply a Safety Factor for Peak Loads
Production lines have surges. A customer places a large order. A machine breaks down and you rush to catch up. The booth must handle 10 to 20 percent more than your standard load.
Multiply your calculated air flow by 1.2 to 1.3. This gives you the design air flow. If your standard calculation says 8 cubic meters per second, design for 10 cubic meters per second. This buffer prevents the velocity from dropping during peak hours.
It also accounts for wear. Fans lose efficiency over time. Filters clog. The booth gets slightly larger as you add racks. The safety factor covers these variables. Without it, the system runs at the edge of its capability and fails on the day that matters most.
Step 5: Check Rack Spacing and Part Geometry
Air must reach every surface. A dense rack blocks the flow. If parts are packed too closely, the powder cloud slows down in the center of the rack. The result is a thin film in the middle and a thick film on the edges.
Keep at least 100 to 150 millimeters of space between rack levels. This lets the air flow through. Do not stack parts flat against each other. Give them space to turn.
Look at the part shape. A flat plate needs a different airflow pattern than a tube. A tube lets air flow through the center. A flat plate blocks it. If your parts are mostly flat, you may need a higher velocity or a different rack design. Do not assume one rack design works for all parts.
Step 6: Verify with a Test Run
The calculation is a guide. The test run is the truth. Load the booth with your standard parts. Run the fan at the design speed. Check the powder cloud.
Look for three things. First, is the powder suspended? If it settles on the floor, the velocity is too low. Second, is there overspray? If powder hits the shop floor, the velocity is too high. Third, is the film even? Check the center and edge of the parts.
Run the line for a full shift. Do not just run it for an hour. Watch for changes. The fan may slow down as it warms up. The filter may clog. The powder may change consistency. The test run reveals these issues.
Step 7: Finalize and Document the Sizing
Once the test run passes, write down the settings. Record the fan speed, the booth dimensions, the rack layout, and the part types. This document is your baseline. If a new part arrives, compare it to this baseline.
Store the part surface area data. If the manufacturer changes the part, request the new data. Do not guess. A small change in part size can break the airflow balance.
Keep the document updated. If you add a second shift, update the production target. If you add a new product, update the surface area. The sizing is not a one-time task. It is a living parameter.
Common Mistakes in Booth Sizing
- Ignoring rack geometry. A large booth with a tight rack layout will fail. The rack blocks the air.
- Using average load. Design for the peak, not the average. The peak is what breaks the system.
- Skipping the test run. The math is a prediction. The test run is the reality.
- Forgetting filter maintenance. A clogged filter reduces air flow. The velocity drops. The powder settles.
- Over-sizing the booth. A big booth wastes energy and creates a long powder path. Match the size to the load.
Final Verification Checklist
Before you sign the purchase order for the powder coating equipment, run through this list.
- Daily production target confirmed.
- Part surface area measured.
- Air velocity selected.
- Booth cross-section calculated.
- Safety factor applied.
- Rack spacing checked.
- Test run scheduled.
This checklist takes ten minutes. It saves weeks of downtime. If you skip it, you pay for the mistake later in touch-up, scrap, and production delays.
How to Handle Future Changes
Your production line will change. New parts will arrive. The volume will shift. The booth must adapt.
If you add a new part, recalculate the surface area. If the new part is 20 percent larger, the total coating area increases. You may need to increase the air flow or change the rack layout.
If you increase the volume, check the safety factor. If the new target is 20 percent higher than the old one, the current safety factor may not be enough. You may need to upgrade the fan or open the booth.
Keep a record of all changes. This history helps you troubleshoot. If the line starts failing, you can look at the last change and find the cause.
When to Consult a Specialist
If your parts are complex, or the volume is very high, consider hiring a specialist. They can run CFD simulations. They can model the airflow in 3D. They can find the dead zones that a simple calculation misses.
This is especially useful for automated lines. A robot picks up a part and places it in the booth. The part position may vary slightly. A specialist can model this variation. They can ensure the powder reaches every surface, even with slight misalignment.
Do not skip this step if the cost of a bad coat is high. A single bad part on a high-value item can cost more than the specialist fee. The simulation is a cheap insurance policy.
Summary of the Sizing Process
The process is simple. Calculate the total area. Pick a velocity. Size the booth. Add a safety factor. Check the racks. Test run. Document.
Each step has a reason. The area sets the flow. The velocity keeps the powder suspended. The booth size matches the racks. The safety factor covers surges. The rack check ensures coverage. The test run proves it works. The document keeps it working.
Follow the steps in order. Do not skip the test run. Do not ignore the safety factor. The booth is the heart of the line. If it is sized wrong, the whole line suffers.
Use this guide to get your first calculation right. Then refine it with real data. The goal is a booth that runs steady, uses less powder, and produces a consistent film. That is the standard for high-volume lines.
Frequently asked questions
What is the best booth width for a 1,000-part line?
There is no single best width. It depends on your rack size and part geometry. Start with 2 to 3 meters and adjust based on your rack layout.
How often should I recalculate booth sizing?
Recalculate whenever you change the part type, the production volume, or the rack layout. A small change in part size can break the airflow balance.
Can I use a standard booth for a high-volume line?
Only if the standard booth is sized for your specific production target. Do not assume a standard size fits your line. Verify the dimensions against your production capacity.
What happens if the booth is too small?
The powder velocity drops. Parts settle. The film becomes thin. You waste powder on touch-up. The line slows down.
What happens if the booth is too large?
The powder path gets longer. The powder settles in the middle. You waste energy moving air. The film becomes uneven.